Thursday 12 September 2013

New Textile Art Pictures - Tobermory and Saltburn Pier

Since my last post, I have been concentrating on producing embroidered landscapes.  After a holiday in the Lakes and Scotland, I was inspired by the fantastic scenery and my first picture, on my return, was the harbour at Tobermory on the Isle of Mull.  For those with kids, you will recognise it as Balamory!


This one was fun to do but the windows took ages.  I thought the reflections worked well and will use this again.

After Tobermory I received a commission to do a view of Saltburn pier, Huntscliff and the funicular railway.
This was to remind the customer of happy days in childhood so the responsibility was huge.  


I have so many ideas for other scenes and I'm really looking forward to creating more.


Friday 2 August 2013

Animal Brooches

This week I had some great news.  A fabulous shop in the Lake District has agreed to stock some of my brooches.  As I started to produce their order, I thought it would be a good idea to document the brooch making process for this blog.

The first step is to produce a pencil drawing to scale of the design. The owl is really a very simple outline.


Each piece of the design is then traced onto bondaweb.  This is basically tracing paper with a fine layer of adhesive on one side.  


As you can see, the body of the owl is one piece, the eyes another and the beak a third.  The final piece (not shown here) is the feet.  The adhesive on the bondaweb is activated once the tracing paper has heat applied to it by ironing it onto the wrong side of the fabric that is to make up the design.

After selecting the fabric to be used for each element of the brooch, the bondaweb is ironed onto the wrong side.


The shapes are then carefully cut out to leave a pile of bits of owl!


The tracing paper is peeled away to leave the elements of the owl design which now have an adhesive layer on the back.  These are arranged on a thick canvas fabric and ironed into place, slowly building up the layers of the design.


Now is the best part.  Time to embroider.  

The embroidery is done on a sewing machine using a darning foot and with the feed dogs dropped.  I usually use black thread to make the design stand out.

Once the embroidery is complete, the brooches are cut out, backed with felt and have a brooch pin added.  The finished product is quite cute if I say so myself!


And here's the other design I have supplied to the shop.


Friday 26 July 2013

North East Landmarks

This week I have been on holiday from the day job to spend time with the kids and to do a bit of sewing too.  As we have been out and about, I have been trying to look at views and landmarks from the perspective of whether I could produce a textile picture from them.

The first piece I did was a general amalgamation of a number of landmarks - the ones that I think make this area identifiable.  I produced a 12" x 10" picture which I have been extremely lucky to sell straight away.  It will be mounted this weekend and then posted to its new home in Stockton-on-Tees.


I am quite happy with how it turned out and will hopefully get some high quality photos before it is posted off so that I can get some greetings cards printed.

A few days ago, my youngest daughter and I went out for lunch at the coast and took this photo.


Although the light wasn't great I thought this was a great subject for a new picture. I finished this one yesterday and am quite pleased with the result.


This one has a lot less patterned material so that you can see the stitching. I also consciously used coordinating thread colours rather than my usual black and am pleased with the result.


Saturday 20 July 2013

Etsy Shops

Today I thought I'd do a post about Etsy.  Although I have known about it for some time,  those who are not crafters seem to be relatively unaware of it.  

I opened my shop, Ruby Patch, in August 2012 and have had between 5 and 15 items up for sale for most of that time.  To date I have had a total of 4 sales!  Not a great outcome for the period of time I have had the shop, but when you compare the cost of putting the items up for sale, the minimal effort it takes to do the admin and the subsequent income earned, I have had a good return.

I have spent approximately £10 in fees for £100 of sales which isn't too bad in my opinion.  If only I could get more sales though.  

I have therefore decided to invest some time and effort in my Etsy shop and will share my experiences with you in future posts. 

My first improvements were completed today and consisted of:

Designing an eyecatching banner 

Your shop's banner should catch customer's attention and make them want to see more.  Here is my original banner - a plain reflection of my logo and name.


Although it reflects most of my branding well, I have changed it as I felt it was leaving too much of the banner blank white. Here's my new banner.


I don't imagine that this will make too much of a difference, but it looks more balanced on the page.

Standardisation of Photography

Last month I did a lot of work re-photographing my products inside of a whitewashed wooden crate.  I uploaded these photos to my website but hadn't got round to doing this on Etsy.  


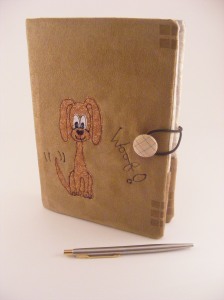
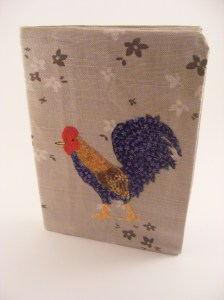
Photo of Travel Journal

Unfortunately, I then discovered that plain backgrounds are more likely to get your products included in treasuries as they will blend well with other people's products if all of the backgrounds are similar.
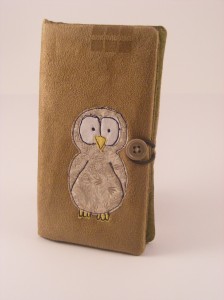
New photo of Travel Journal
Personally I like the first version, but am willing to try the plain approach to see if it affects sales.


Uploading More Products

I am adding a lot more products, the total is currently standing at 29, and intend to add even more.  As it only costs $0.20 to list an item, it seems silly not to have had everything on here from the start.  After all, people are never going to buy products that aren't being advertised as being for sale are they?

Joining Teams

As with most other selling platforms, Etsy has very active seller groups, called Teams.  I have joined a few and will try networking on here for a while to see if this has any effect. 

So that's been today's progress.  I will update on any other adjustments I make and also on the astronomical increase in sales as a result!!  :)  


Saturday 22 June 2013

Additional Notebook Designs

I thought it was about time I posted an update on what I've been getting up to lately.  After developing the range of notebooks I have posted about previously, I have been asked for a number of custom designs too.

At a craft fair recently, a lady asked me if I would design an A6 notebook cover so that she could record her grandson Tiaan's speech development.  As she provides child care for him, his parents were keen for her to keep a record of the new words and phrases he learned in their absence.  I thought this was a lovely idea and would make a great keepsake.  Here's the finished item.


I have also designed some customised A5 notebook covers for teacher's gifts.  My niece is leaving middle school this summer and wanted special gifts for her two teachers.  I was pleased with the results but they were completely unique to the individual and therefore some of the motifs will not make sense to people that don't know them.


Who knows what notebooks designs will be next.....  Well it is possible that one might be entitled 'Soapy Notes'.  My friend Deborah, who owns Peculiar People soap and beauty products wants a notebook to reflect the soap making process.  That will definitely be a challenge!

Saturday 27 April 2013

Journals

My new range of journals and notebooks is now half complete.  I have designed and made four of them so far and I am really pleased with them.  There will be another four to complete the range but they are still 'in development'.

Although I have made notebook covers before,  they had covers that were based on a very simple applique design.  This time I approached it differently.  The cover designs the purpose of the notebook/journal.

The first is a recipe notebook.  It features a kitchen scene with a cupboard and an aga.

Recipe notebook Back

Recipe Notebook Front 2


The second design is my favourite as it is a sewing  notebook based on my own workstation.  My sewing machine isn't actually flowery but other than that, the design is quite faithful to the original!

Sewing Notebook Front 3 Sewing Notebook Back


The third design is a travel journal.  It is quite a feminine design with a sun hat on a deckchair next to a cool drink on a little table.  One of the designs I will be working on soon will be a more masculine travel journal.

Travel Journal Front Travel Journal Back


And the final design so far is a gardening notebook.  I wasn't sure of this design at first but it has really grown on me and is now possibly my favourite so far.

Gardening Notebook Gardening Notebook back


The notebook covers are all A5 size and I supply them with a hardback lined notebook.  They are for sale on the Make the Most of website and in my Etsy shop www.etsy.com/uk/shop/rubypatch

Monday 25 March 2013

Easter Purses

This weekend has been all about purses.  My sister asked me to design a couple of purses for the daughters of her friends that she could give them in place of easter eggs.  As both of them love dance class, she wanted this built into the design.  The designs are based on descriptions of the girls themselves and the applique started with just the outline shapes.

2013-03-24 15.01.43


The designs were then applied to the purse fabrics and the embroidery added the real detail and life to the little ballerinas.

2013-03-24 18.02.12

Sunday 24 March 2013

New Products

The last couple of months have been quite eventful in the world of Ruby Patch.  I have had to take a lot of time off from sewing due to a particularly nasty stomach virus which was a real blast.  Nausea is really not conducive to creativity.  So the great plans I had for developing new products were badly delayed.

I have felt a lot better in the last week or two and consequently productivity has increased.  In addition, I was invited to become an artisan on Make the Most of, a site which supports the sale of hand made, artisan and designer products.  All in all, I am feeling really positive about developing the business.

The first new products I have been working on are storage boxes and bowls.  Using recycled denim and cotton, I tried a square and round bowl to see which would be quickest to make.  The two trial runs were successful with the square shape being quicker to put together but this one used a lot more fabric.  The bowl with the circular base was quite attractive but fiddly to put together.

2013-03-06 19.43.10


2013-03-05 21.20.31

After buying some lovely new linens and cotton linings, my next attempt was a square box with handles.  This was quite successful but still used a lot of fabric and interfacing.

2013-03-09 14.32.43


2013-03-09 16.47.15


I then went onto bowls with circular bases.  I have make three of these and they were all successful.  There were lovely to make until it was time to add the bases.  This became more tedious the more I did.  I am still undecided whether to continue making these as I may end up rushing them in frustration and spoiling the finish.  I cannot see my patience improving if I know I have to make a number of these!

Anyway, here are the three that I made.

2013-03-17 11.36.37 2013-03-17 11.36.21 2013-03-17 11.36.11 2013-03-17 11.35.21

Saturday 26 January 2013

Watercolours

Although I haven't done much sewing in the last couple of weeks, I have still been making things.  I decided to try a bit of watercolour painting and, as I have a thing about houses, this is the subject I have concentrated on.

Here are my first few attempts.

2013-01-20 16.50.53


2013-01-20 19.17.13

DSC_0106

2013-01-20 16.50.00

Mixed Media Experiment

I've had a really busy few weeks at the day job so I have not had much time for sewing.  I have managed to do a bit more of my Moot Hall picture.  Here is a sneak peek at the progress.


2013-01-22 22.01.36


I have done some of the background but it is only part finished so you will have to wait to see it.


Tuesday 1 January 2013

Notebooks

Notebook covers are a good way to put a whole picture on an item rather than just a motif.  In an extension to the Highland Cow and Sheep purses, I thought I'd try some other animals in different styles and notebooks covers seemed ideal for this.

2012-02-14 00.56.062012-02-15 03.53.19

2012-02-14 00.44.342012-02-14 00.44.59